Friday, July 6, 2012

Craft Room Updates: Phase II

Phase II of the craft room update is finally finished! This project was a back breaker...I spent 7 hours - yes, 7 hours! - on a Friday night completing it. Once I popped, I couldn't stop! I was working solo aside from my trusty assistant, B, who took it upon herself to take some awesome photographs!

Here's where we left off - one coat of paint.


This is how I measured my stripes...in Phase I, I noticed that the yellow color was trying to fight its way though the fresh paint, so I decided that I wanted the darker stripes to be thicker than the others. I drew out a "map" on a random box and quickly did the calculations for how wide to make each row.

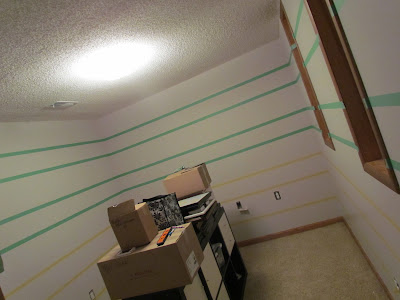
Here's where I came across an issue; I used a yard stick to make ticks along the wall from the trim up to follow along with the tape. Shortly after starting the first side, I noticed that the tape was not straight... since the owner finished the basement himself, the trim, flooring, and even ceiling is not perfectly even.


I resorted to using an 8" long leveler. I made the first mark using the yardstick, then followed along the wall sliding the leveler and making sure the ticks were even. It took forever!

As you can see, B got some amazing shots of this process...it was really hard to get down there, ya know!
Once the first stripe was finished all the way around the room, I made ticks on each end and in the middle just to make sure that the leveler was reflecting the measurement properly (the walls tend to bubble out in a few places which easily puts you off track by even 1/4"). I was also careful as I had to use different widths of tape to measure from the same side...ex I used the ticks I made along the wall for the top of the tape initially. When I measured the second row, I was sure to make the ticks and tape using the bottom. This alternated as I went up to make sure the stripes were the size I wanted; the tape will obviously stay the same color as the wall, so if you want 12" even stripes, the base color won't actually look 12" because the tape will cover a few, but remember that you remove the tape!
 

Photobomber! (I had to, it's so funny to me that she was taking pics for hours...I go to look back and there are about 30 of these, and many of random objects throughout our house)


Finally, the measuring and taping was done! That took the longest. As you can see, the stripes aren't even which is what I wanted (they are only really 1.75" different).

Then I started painting! The color is a semi-gloss, cocoa rose. We used the same in our main bathroom asnd I knew as soon as I saw the combo that I was going to love it!


Because it took so long doing this solo, I was able to get two coats on the stripes and take the tape off before going to bed! I love projects that give you the satisfaction of being complete right away!

These windows were the hardest to tape around, but they came out looking AMAZING!

(It was about 1am at this point, which is why it's so dark out there!)

Here's one of my complaints...the tape stuck to some bubbled paint and yanked it off...even took part of the yellow from before off! This is a close up, but because of where it's at (and the fact that I ran out of the base paint) I can put the shelf in front of it and not worry about it unless we paint again.

I used generic, blue painter's tape, or the green frog tape, and here are how some of my lines came out.

At the beginning, however, I was using Frog Tape for delicate surfaces, which revealed a much cleaner line! Too bad I ran out of it so quickly! (yellow tape)

Seriously, I love how this turned out, and I'm glad I decided to go all the way around instead of doing an accent wall. Because the room doesn't have legit windows and isn't very big, the stripes give it the illusion that it's bigger.

I'm gonna love looking at this whenever I craft!
What's a bold project you've completed that turned out even more amazing than you anticipated?

No comments:

Post a Comment